1. Start
Select a color, a word, a symbol, an image. It doesn't matter what you start with. Just start. With anything. The starting is what matters.
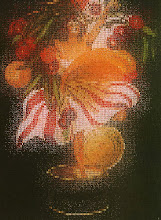
This is one of the first pages I made several years ago. It's still one of my favorites, and I really had no idea what I was doing. I simply started. It's really all about the soul.

2. Play
Let your imagination wander. Allow yourself to freely select words, symbols, colors, images. Remember, this is about the soul, not the intellect, and so things don't have to make sense -- in fact, they may NOT make sense.
The woman wearing aviator glasses was in a funky sports magazine ad. I ripped out the page and set it aside. Later I noticed that she seemed to say to me 'have fun! dare to be daring! you can do anything!' in a powerful combination of playfulness and courage.
3. Mess Around
Use scissors to cut something out ... or simple rip around the edges.
I love this method: because there is no way to make something perfect, there can be no imperfection -- Freedom!!!
4. Select a Journal Page
Did you notice? This does not have to be step one. If you haven't selected a journal or some kind of pages for your background, you can do that now. You can use a journal you already have as long as you're comfortable with a few bumps or wrinkles as you can see here, particularly around the glass tiles.
You can also start with a sheet of paper, a sketch journal from the dollar store, or a book from the reduced-for-quick-sale section at your favorite used book store. That's what I've done. I'm in love with books, and this just made sense to me for my Soul Journals.
5. Begin a Background
I brushed on green paint first. Any kind will work; inexpensive acrylics from a craft store are great. You can dry it more quickly with a hair dryer; then it's helpful to lay a piece of wax paper on top, held down by a heavy book so the pages won't curl. While this dried I leafed through magazines where I found this wonderful quote, the Grecian woman, and the large vintage clock.
6. Add for Depth and Texture
You can continue to work with the background to add layers.
Here I took a pad of dark brown ink to brush the edges and smear around the perimeter. I like to use my fingers, a bit of kitchen sponge, or brushes.
Then I smudged on some darker green paint. There's no rhyme or reason. The layers will add depth and interest ... much as the soul has mystery and unknown dimensions.
7. Mess Around Again
I placed words and pictures, moved them around, selected more items, discarded some, added some back in, and changed everything around again.
This is part of the process: allow the soul to freely wander.
After I cut out the clock (I think it was from a Smithsonian magazine ad) I wrinkled it up into a ball. Using the dark brown ink I rubbed over the wrinkles and around the edges -- instant aging! The numbers were from some product box or another -- there are interesting words and numbers all around us.
8. Stand Back
Do you want to move something a bit? Completely alter the arrangement? Add something else? Trust your intuition.
When it seems done, go ahead and glue down your collage pieces. Can you see a shine on these pages? Sometimes I use clear collage gel that dries with a gloss finish. (Remember, you can dry your pages more quickly with a blow dryer and then re-flatten with wax paper and a heavy book.)
9. Finishing
Ribbon, string, and pieces of fabric can be glued down the center or tied to the side; simply poke holes near the edge of the page, pull fabric or ribbon through and tie. Bronze glass mosaic tiles, dragonfly brads, an old button, and vintage stamps finished off the pages.
Is there still something you decide you want to change? You can. Or you can leave it. Imperfect? Unfinished? ... When is anything perfect? Or finished?
Maybe it's perfectly imperfect just as it is. This is all a process.
10. Enjoy
Have you noticed how a very young toddler will take a picture book and stare at the pictures for ages? I often wonder what's going on inside.
Try the same thing yourself.
Allow your gaze to wander into thoughts, memories, hopes, dreams ... allow yourself to settle into serenity, joy, quietness ... and enjoy the journey.
Look for future posts on continuing your soul journal. Meanwhile, don't forget the first step ... Start.
Please remember to post your comments and ask questions. I'd love to know you've visited and I'm always glad to explain things!


7 comments:
Wonderful workshop. I can tell you are enjoying this blog
Its working
Maybe we can do this workshop "live" as one of our art activities in Steamboat? Perhaps each of us could take a turn teaching something that we know... or maybe that's too organized. :-)
Fun! Soulwork doesn't have to be drollwork...huh!
Love this. It's so you, nourishing, peaceful.
Sounds like fun! Ginger
Post a Comment